From Docker Compose Chaos to One-Click Deploys: My €8/month VPS Stack
Self-hosting has a reputation for being fragile, time-consuming, and only worth it for hardcore sysadmins. I don’t think that’s true anymore. After a couple of months of iteration — some of it painful — I’ve landed on a stack that is genuinely pleasant to work with: fast deploys, automatic HTTPS, monitoring with alerts, and a bill that stays under €10 a month.
This is the story of how I got there.
The Foundation: Hetzner + Cloudflare
Everything starts with a €8/month Hetzner CX22 — 2 vCPUs, 4 GB RAM, 40 GB SSD, a dedicated IPv4 address, and a datacenter in Europe. For personal projects and side work, this is more than enough horsepower.
The domain (cferndp.com) is managed through Cloudflare, with all DNS records proxied through their network (the orange cloud in the DNS panel). This gives me DDoS mitigation and hides the real server IP from the public internet for free. SSL is set to Full (strict) mode, which means Cloudflare validates the certificate on the origin server — no self-signed certificates trusted end-to-end.
 Cloudflare DNS panel — note the orange proxy clouds.
The Firewall Trick
Here’s the piece most tutorials skip: with Cloudflare proxying all traffic, the only IPs that should ever reach my server are Cloudflare’s. Every other connection — port scanners, bots, direct-IP attacks — should be dropped before it even reaches the OS.
Hetzner has a network firewall that sits in front of the server at the infrastructure level. I configured it to only accept inbound traffic from Cloudflare’s published IP ranges. Everything else is silently dropped. The server is effectively invisible to anything that isn’t going through Cloudflare.
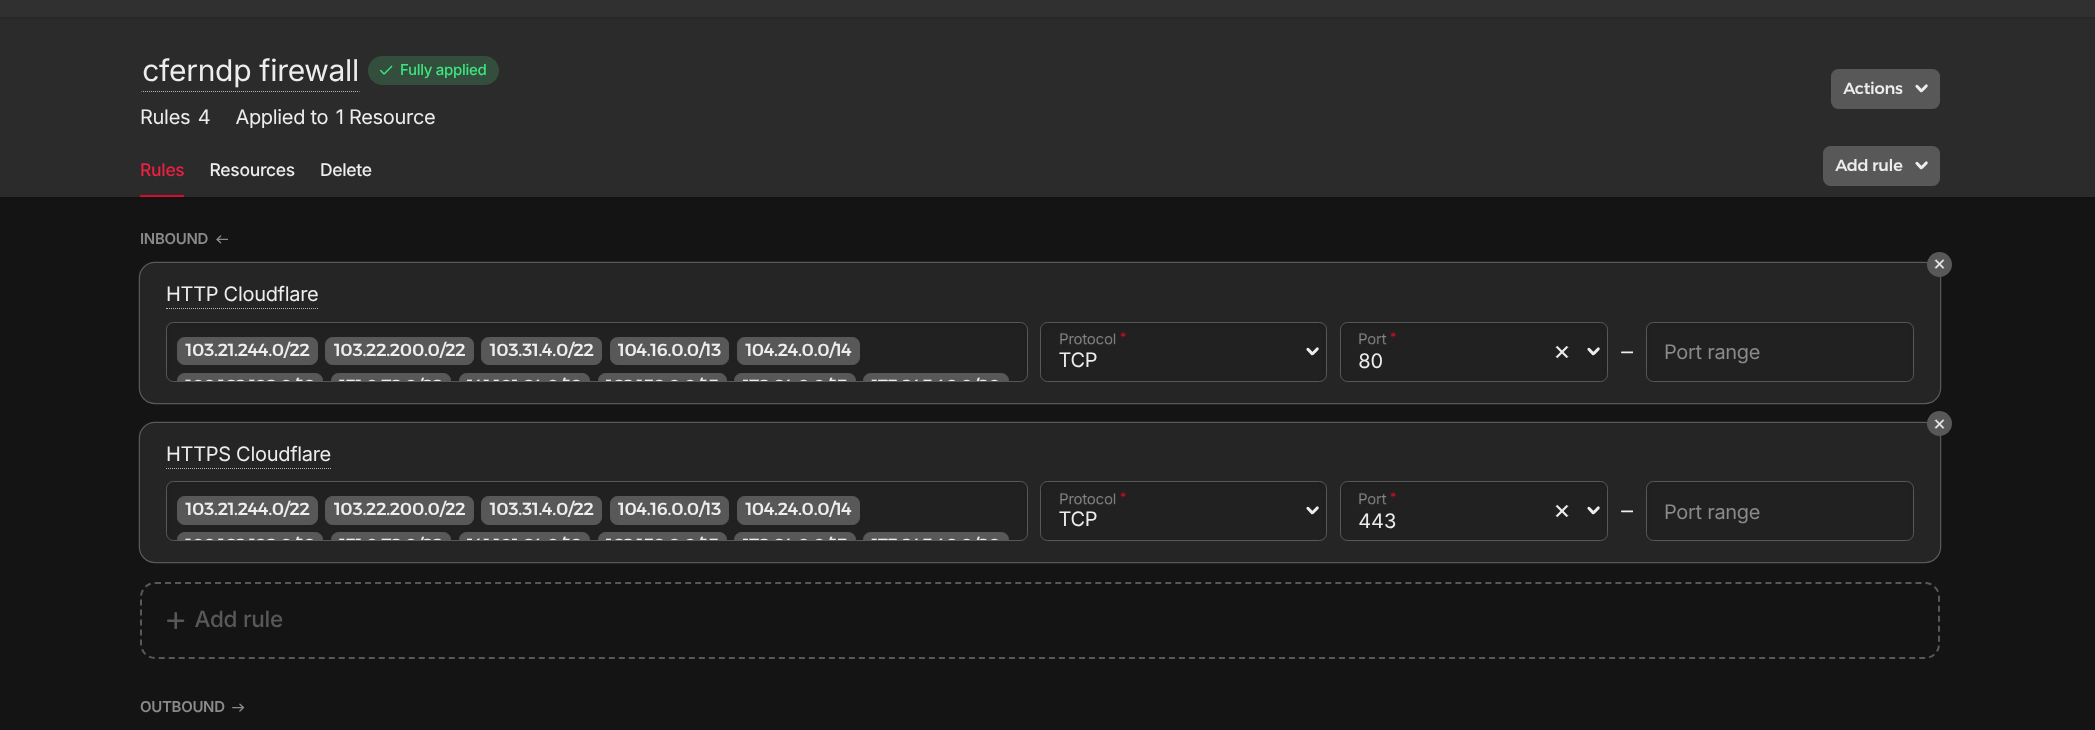 Hetzner Cloud firewall — only Cloudflare’s IP ranges are allowed inbound. Everything else is dropped at the network level.
This combination — Cloudflare proxy in front, infrastructure firewall behind — means the server never sees raw internet traffic. It only talks to Cloudflare, which talks to the rest of the world.
Version 1: The Docker Compose Era
When I first set up the VPS, the approach was entirely manual. Every service was a docker-compose.yml file with hand-rolled configuration.
The landing page back then was a static HTML file. I had one compose file spinning up an Nginx container to serve it. Simple enough.
For routing different services to different subdomains, I added Traefik — a reverse proxy that can read Docker labels to figure out which container handles which domain. That lived in its own compose file.
# The Traefik compose file (simplified)
services:
  traefik:
    image: traefik:v3
    command:
      - --providers.docker=true
      - --entrypoints.websecure.address=:443
      - [email protected]
    ports:
      - "80:80"
      - "443:443"
    volumes:
      - /var/run/docker.sock:/var/run/docker.sock
And every service that wanted to be routable had to declare its own Traefik labels:
# Each service's compose file
services:
  my-app:
    image: my-app:latest
    labels:
      - "traefik.enable=true"
      - "traefik.http.routers.my-app.rule=Host(`app.cferndp.com`)"
      - "traefik.http.routers.my-app.tls.certresolver=le"
      - "traefik.http.routers.my-app.entrypoints=websecure"
For two services this was manageable. For five or six, it became a maintenance problem:
- Adding a new service meant touching at minimum two files — the service’s own compose and sometimes the Traefik config if any routing logic was non-trivial.
- There was no UI. Debugging a misconfigured label meant grepping through YAML and restarting containers.
- No deploy history. If something broke after
docker compose up -d, rolling back meant manually reverting git commits and re-running compose. - No real monitoring. I was relying on
docker psand logs to notice if something had crashed.
It worked, but it didn’t scale gracefully with the number of services or the frequency of changes.
The Coolify Discovery
A former DevOps colleague mentioned Coolify in passing — one of those “you should really look at this” recommendations that you bookmark and forget until the pain gets bad enough. When the Docker Compose friction finally did get bad enough, I went back to that bookmark.
Coolify is also available as a one-click app in Hetzner’s marketplace, which made the initial setup trivial: spin up the server with the Coolify image, point the DNS at it, and you have a working, TLS-secured admin panel in about 20 minutes. All routing configuration is managed internally — you never touch a config file manually again.
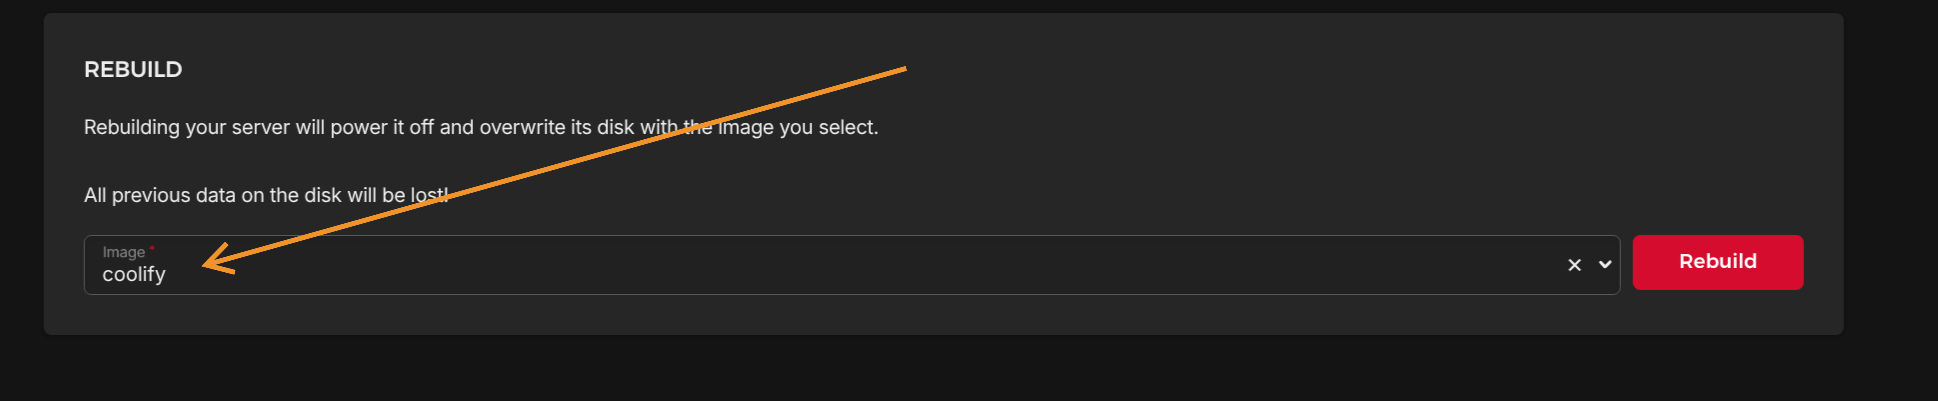 Coolify is available directly from Hetzner’s marketplace — the server comes with everything pre-installed on first boot.
The mental model shift is significant. Instead of “I have a bunch of docker-compose files on a server,” you get:
- Projects → logical groupings (e.g., “Personal Portfolio”, “Monitoring”)
- Environments → production, staging, etc.
- Services → individual deployable units within an environment
What Coolify Actually Changes
Deploying This Site
This site (the Astro 6 static build) is one of the services in my Coolify instance. The deploy flow is:
- In Coolify, create a new service → connect the GitHub repository
- Select Nixpacks as the build pack — Coolify auto-detects Node.js, installs dependencies, runs
npm run build, and serves thedist/output - Set the domain (
cferndp.com) and port — one form, one save - Hit deploy
That’s it. No Dockerfile required. Nixpacks figures out the build steps from the project structure, and Coolify handles routing and TLS certificate provisioning automatically.
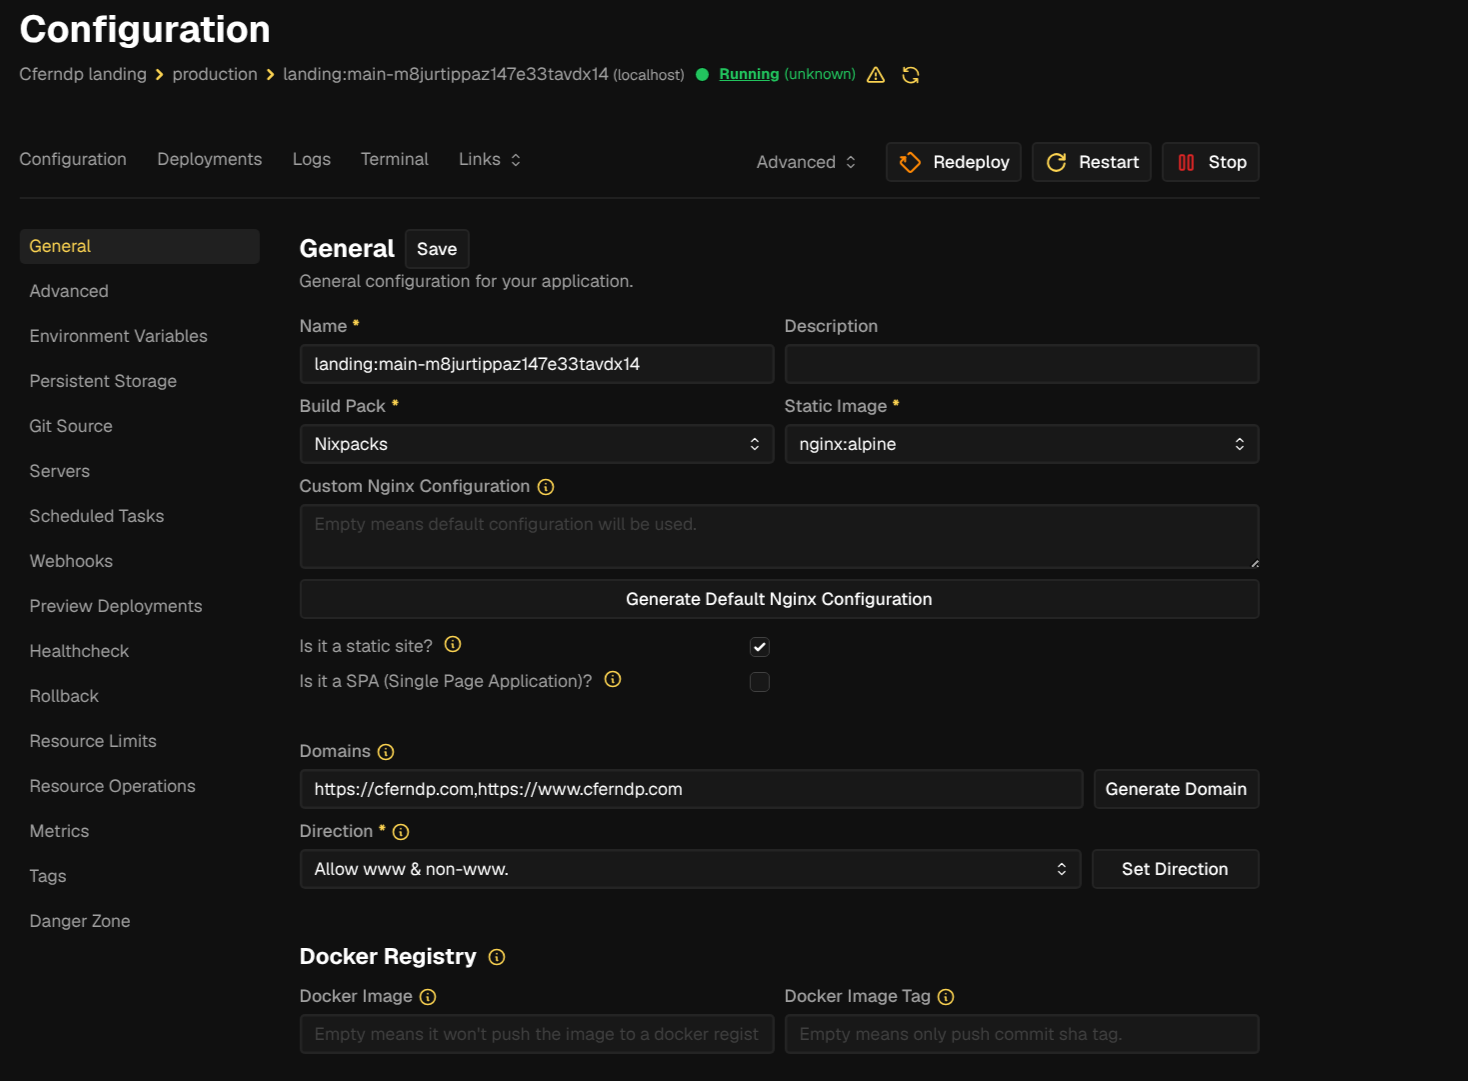 Coolify service config — Nixpacks is selected as the build pack. Domain, port, and routing are all set in one panel.
CI/CD That Feels Like Vercel
Coolify integrates with GitHub via webhooks. After the initial setup, every push to the configured branch triggers an automatic redeploy — the same flow Vercel or Netlify use, but running on your own server.
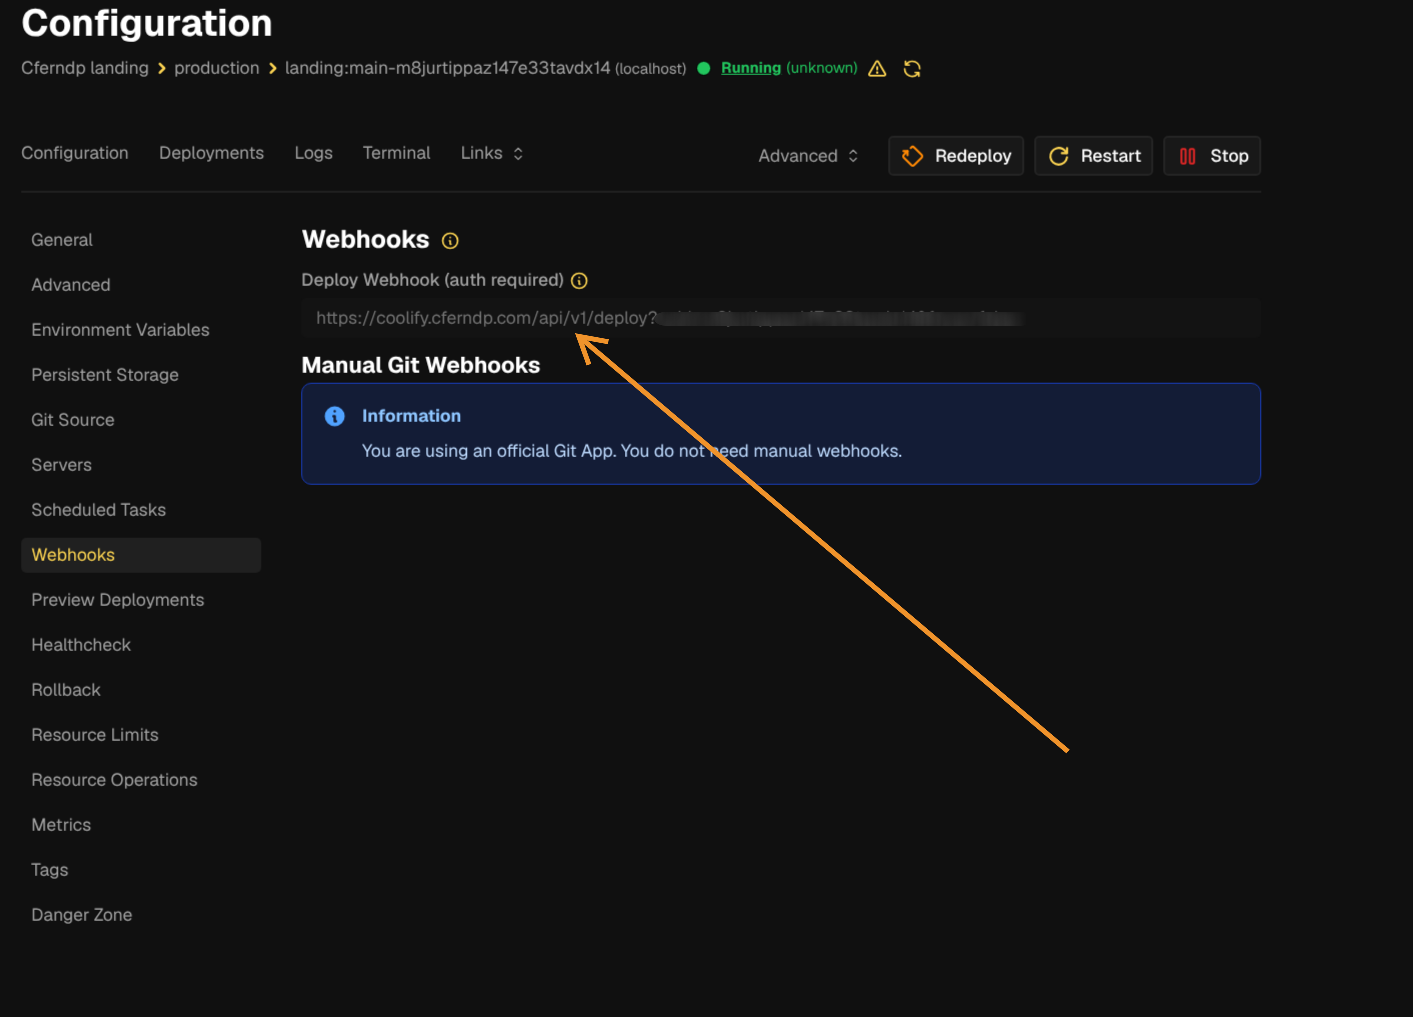 Coolify’s webhook settings — connect a GitHub repo and every push to
 main triggers a new build and deploy automatically.
The deploy logs are visible in real time in the Coolify UI, and there’s a full history of past deploys with timestamps and status. Rolling back is a button click.
The Services Catalog
One of Coolify’s most useful features is a built-in catalog of one-click-deployable services: databases, monitoring tools, analytics platforms, CMS options. Installing a new service that would have previously required writing a compose file, configuring a reverse proxy, and fiddling with networking takes about 90 seconds.
I used this to set up a Uptime Kuma monitoring instance — a self-hosted uptime monitoring app. Click install in the catalog, set a subdomain, deploy. Done.
Security and Operational Features
2FA is available for the Coolify admin panel out of the box. Given that the panel has deploy access to all services, locking it down properly is non-negotiable.
Cloudflare R2 integration for backups: Coolify can push backup snapshots to an S3-compatible bucket. I have this pointing at a Cloudflare R2 bucket (which has a generous free tier). No extra infrastructure needed.
Notifications via Telegram
Both Coolify and Uptime Kuma support sending alerts to a Telegram bot. The key detail: both tools share the exact same bot token and chat ID. All alerts — deploy failures from Coolify, uptime drops from Kuma — land in one single Telegram chat, giving you a unified ops feed without any extra tooling.
The setup for each tool is identical: create a Telegram bot via BotFather, grab the token, create a group or personal chat, get the chat ID, paste both values into the notification settings. Five minutes per tool, one channel for everything.
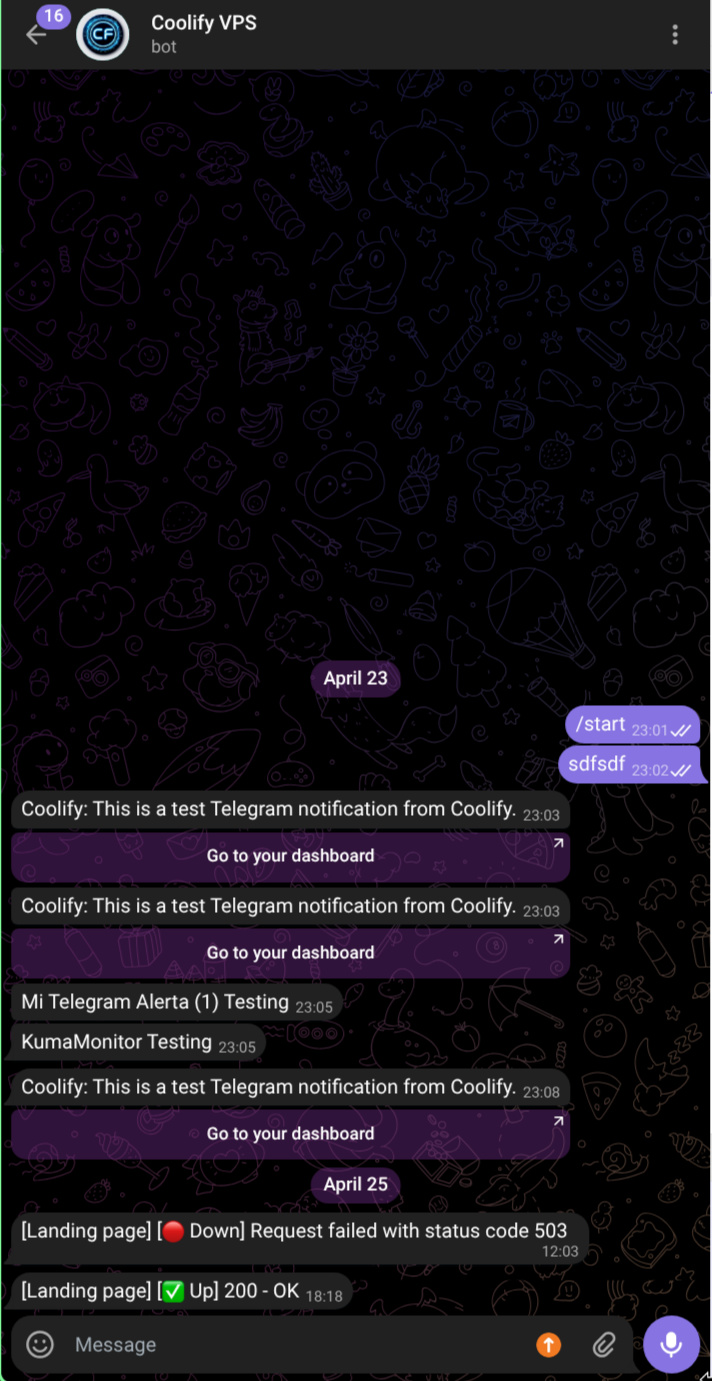 One Telegram chat, two tools — Coolify deploy events and Uptime Kuma alerts centralized in the same feed.
I get notified on my phone the moment something breaks. No dashboards to check, no email to filter through. Just a message, immediately.
The Full Picture
The current stack, from DNS to running container:
User request
  └─→ Cloudflare (proxy, DDoS mitigation, SSL termination)
        └─→ Hetzner network firewall (only Cloudflare IPs pass)
              └─→ VPS (Coolify manages routing + all containers)
                    ├─→ cferndp.com       → this site (Astro, Nginx, Docker)
                    ├─→ status.cferndp.com → Uptime Kuma
                    └─→ ...
The cost breakdown: €8/month for the Hetzner server, €0 for Cloudflare (free tier covers everything I need), ~€0 for R2 backups (well within the free tier). Under €100/year, total.
Gotchas and Lessons Learned
The Missing www Domain
After deploying the landing page, everything looked fine — cferndp.com resolved correctly. But www.cferndp.com returned an error. The cause was trivially obvious in hindsight: I had configured only cferndp.com as the domain in the Coolify service settings and completely forgot to add www.cferndp.com as an additional domain.
The fix took about 30 seconds in the Coolify UI: open the service, add www.cferndp.com as a second domain, redeploy. Coolify handles the routing and TLS certificate for both domains independently. It’s a classic “I’ve been staring at the config too long” mistake, and the kind of thing that’s easy to miss when you’re focused on the deployment itself rather than DNS coverage.
What I Would Change
There is one friction point with this setup: the Hetzner firewall IP whitelisting requires manual updates when Cloudflare updates their IP ranges. Cloudflare publishes the list at cloudflare.com/ips, and it doesn’t change often, but it’s a manual process that could theoretically break traffic if a new range is added and not whitelisted. A cron job that hits the Cloudflare API and syncs the Hetzner firewall rules automatically would close this gap — it’s on the list.
The other thing I would do earlier is commit to Coolify from day one instead of going through the Docker Compose phase. The manual approach taught me how things work under the hood, which I don’t regret, but the operational overhead wasn’t worth it compared to what Coolify provides.
Self-hosting used to mean accepting operational pain as the cost of control. With a solid foundation — a cheap but capable VPS, Cloudflare in front, and Coolify managing the rest — it’s genuinely competitive with managed platforms for personal and small-team use cases. And the bill stays under €10 a month.